Tag: Basics

  • The Rules

    The Rules

    The Rules of the Kitchen
    It isn’t always about weed. (Well, yes. Here it is.) But you also have to know your way around a kitchen.
    The kitchen is a workshop that uses food instead of wood or metals. It is always a good idea to conduct yourself like you’re in a machine shop or garage – screw around and there are lots of things that can hurt you. So I came up with a series of rules to help people remember how to behave around sharp, pokey things, boiling oil, and open flame.

    The Rules of the Kitchen
    * Knives are sharp
    * Stoves are hot
    * People are dumb

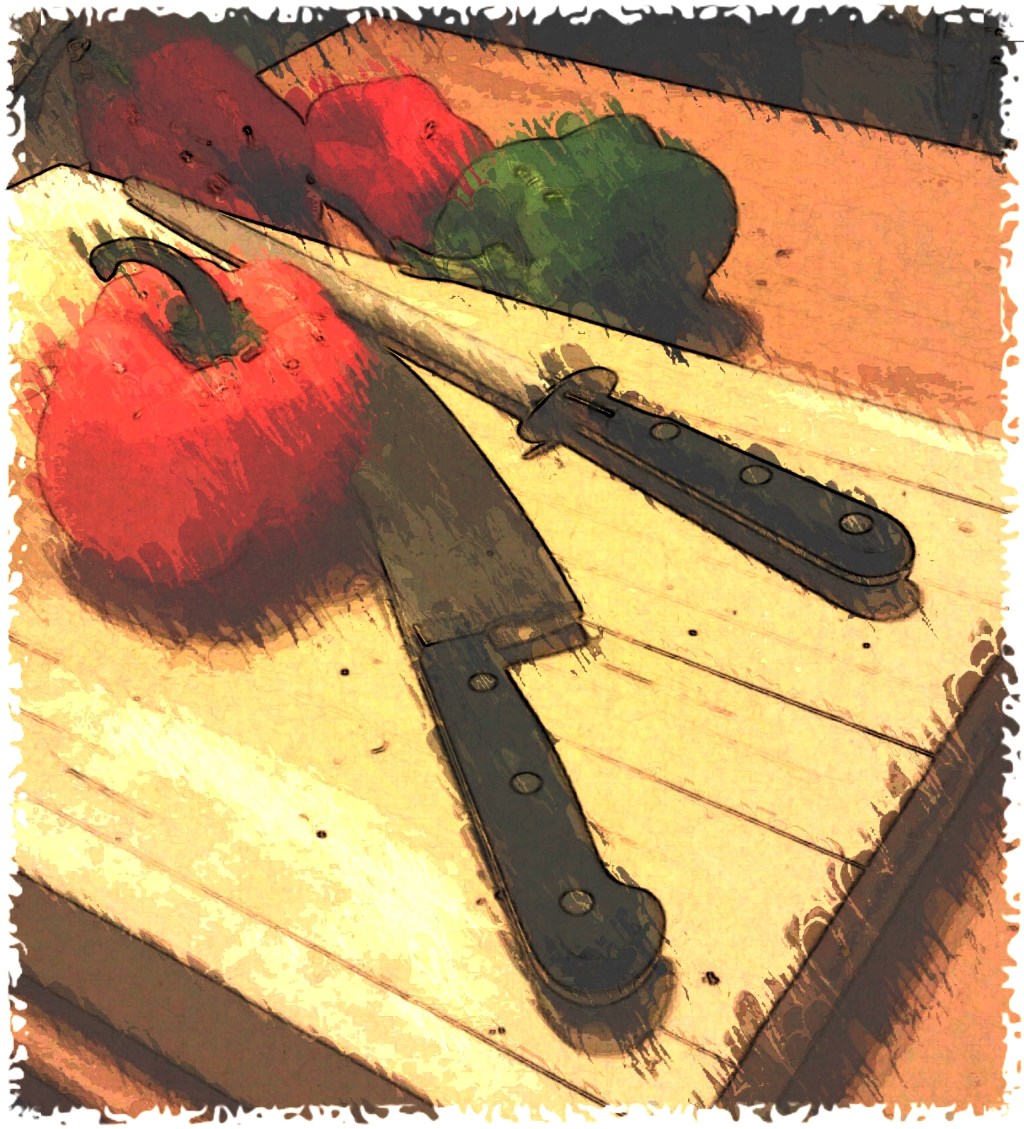
    Rule No. 1 – Knives are sharp
    At least they should be. A sharp knife is a safe knife. Why? Because a sharp knife lends itself to proper technique. One does not chop by banging the edge like a hammer. You slice. You let the knife do the work. Your hands are there to guide the blade. You don’t push it, you don’t force it, and you don’t let it get dull. If you do, the knife will slip and you will cut and/or stab yourself. You will bleed and likely require stitches and worse, you will have ruined dinner. Putz! Keep your knife sharp!

    Rule No. 2 – Stoves are hot
    In many (most?) working kitchens, the stoves are always on. Baking, roasting, braising, sauteing, frying – the first step in every one of those techniques is preheating your stove. Now here’s the rub – even if you don’t see flames or your burners are not glowing red, ESPECIALLY at home where you can’t tell, always ALWAYS assume your stove is hot. Don’t lean on it, don’t sit on it, don’t put anything on or in it unless you want it to burn.

    Rule No. 3 – People are dumb
    Dumb is a strong word. I’d like to think people are not born evil, but after my time in the industry I can conclude if you dial-down your expectations you will never be disappointed. It’s best to divest yourself of any ownership and let yourself be amused by such errant behaviour as:
    Ignoring the first two Rules. – The knife was dull and you got cut. The stove was hot and you got burned. The floor was slippery and you ran and fell. I, I…I can’t help you.
    Asking for substitutions – No, the menu was designed this way for a reason. YOU came to ME. If you want to cook, stay home.
    Zero situational awareness – There’s a reason we say ‘behind,’ ‘corner,’ ‘sharp.’ ‘hot.’ Because they are those things. Simple, short, sharp little words that carry entire conversations.
    Comps and freebies – You’re rich? Good. You can afford to eat here. I’m not taking it in the pocketbook just because you’re my friend or you have notoriety.
    Being mean to restaurant staff.  – Don’t be a jerk. Shush! Just, no.
    Theft  – If it’s not nailed down, counted, or regulated (even if it is those things), it will go walking.

    Annnd we’ll stop there.
    Those are the Big 3. But there are a few other things to keep in mind too. Not rules so much as best practices. These include:

    Taste everything
    My former mentor Chef Jesse Chambers always said we eat first with our eyes, but we refine our skills by tasting everything. (Okay, not everything. I don’t advocate licking raw chicken ice cream or noshing pork slushies. That’s dumb.) When we cook we engage all our senses but sight, taste, followed closely by smell, rule. You can not tell if something is seasoned without taste, can not judge the consistency of a sauce, the bitterness of chocolate, the texture of bechamel, or what choice of wines and whiskeys will balance a meal.

    Clean as you go
    I have Earl’s to thank for this. Reduced to the acronym CAYG it was Part 2 of Restaurant gospel (Part 1 being fresh food stripped of ornamentation). It means owning and finishing what you start – if you make a mess, clean it up right then and there. If you do your dishes and wipe your counters as you go along, there is precious little to do at the end except sweep and mop.

    Have fun
    Also an Earl’s lesson. This is hospitality. It’s the reason we’re here. That, and we’re hungry.
    The things that are necessary can be the sources of great joy. The  pleasures of the table are some of the greatest in life, so enter the kitchen with a sense of anticipation and eagerness. Some of the best times of your life will happen in the kitchen. The best parties happen in the kitchen. Enemies become friends, family is reunited.
    When you are fed, the world is just a better place.

    Life is better lifted, so why not make yours a feast?

    Bud

  • Calculating Dosage

    Calculating Dosage

    Because, who doesn’t love math?

    Calculating the dosage of cannabis-infused edibles is a critical aspect of cannabis cooking, ensuring both safety and efficacy. Cheri Sicard, a renowned cannabis chef and author, provides a comprehensive manual method for determining THC content in homemade edibles. Her approach, detailed in her writings, offers a systematic way to estimate the potency of your culinary creations.

    Understanding THC Content in Cannabis

    The first step in calculating dosage is to understand the THC (tetrahydrocannabinol) content of the cannabis you’re using. THC is the primary psychoactive compound in cannabis, and its concentration can vary widely. If you have access to lab-tested cannabis, you’ll have precise THC percentages. However, if such information isn’t available, estimates are necessary.

    For estimation purposes, using a 10% THC content is a reasonable starting point.

    The Calculation Process

    1. Determine THC per Gram

    One gram of cannabis weighs 1,000 milligrams.
    Assuming 10 per cent THC, each gram contains approximately 100 milligrams of THC (10 per cent of 1,000 mg).

    2. Calculate Total THC in the Infusion

    Decide how much cannabis you’ll use in your infusion.
    So using a full ounce (28 grams) of cannabis with 10 per cent THC to make one cup of butter, the calculation looks like this:

    28 grams × 100 mg THC/gram = 2,800 mg THC

    3. Determine THC per Serving:

    Consider the amount of infused butter used in a recipe. This is where you figure out how strong each piece really is.

    Let’ say your recipe calls for a half-cup of this butter. Since 1 cup = 2,800 mg THC, ½ cup = 1,400 mg THC.

    Now divide this amount by the number of portions you are making. So in this case, that half-cup of cannabutter is used to make 36 cookies: 1,400 mg THC ÷ 36 cookies ≈ 38.8 mg THC per cookie.

    Adjusting Dosage

    If the calculated dosage per serving is higher than desired, you can adjust.

    Diluting the Infusion Mix the cannabis-infused butter or oil with regular butter or oil to reduce the THC concentration.

    Reducing Infused Ingredient Quantity. Essentially, use less of the infused ingredient in the recipe and supplement with non-infused counterparts, like regular butter.

    Conversely, if the dosage is too low, you can:

    Increase Infused Ingredient: Use more of the cannabis-infused butter or oil.

    Enhance with Concentrates: Add decarboxylated cannabis concentrates like kief, hash, or hash oil to boost potency.

    Factors Influencing Dosage Accuracy

    This is NOT an exact science! Edibles, especially home made, can be inconsistent. Several variables can affect the accuracy of your dosage calculations:

    Decarboxylation: Perhaps the most critical step, properly heating cannabis to activate THC is crucial. Incomplete decarboxylation can result in lower potency.

    Cannabis Potency Variability: Without lab testing, THC content is an estimate, and actual potency may vary.

    Extraction Efficiency: The method and duration of infusion can influence how much THC is transferred to the butter or oil.

    Practical Tips for Home Cooks

    Start Low and Go Slow: Especially for those new to edibles, begin with lower doses to gauge individual tolerance.

    Keep Detailed Records: Note the amounts of cannabis used, THC estimates, infusion methods, and personal effects to refine future preparations.

    Use Dosage Calculators: Online tools can assist in estimating THC per serving, enhancing accuracy.

    Accurately calculating the dosage of cannabis-infused edibles is essential for a safe and enjoyable experience. By following Cheri Sicard’s outlined procedure, home cooks can make informed decisions about the potency of their creations. Always consider individual tolerance levels and start with conservative dosages, adjusting as needed based on personal experience and desired effects.

    As always, consume at your own risk. Please respect the cannabis laws of your jurisdiction. Do NOT get lifted and drive or operate heavy machinery.

  • Blanching Cannabis Before Decarboxylation: A Step-by-Step Guide

    Blanching Cannabis Before Decarboxylation: A Step-by-Step Guide

    When it comes to cooking with cannabis, achieving the perfect balance of potency and flavour can elevate your culinary creations. One often-overlooked technique that can enhance both is blanching cannabis before decarboxylation. Popularized by Jeff the 420 Chef, this method removes impurities and some of the plant’s bitter taste, making it a preferred choice for those who value a cleaner flavour profile.
    In this guide, we’ll explore the benefits of blanching cannabis, provide a step-by-step overview of the process, and explain how it integrates seamlessly into decarboxylation to prepare your cannabis for edibles.


    Why Blanch Cannabis?
    Blanching is a technique that briefly submerges cannabis in boiling water, followed by immediate cooling in an ice bath. This process is widely used in vegetable preparation to preserve colour, texture and nutrients, but its application in cannabis has an additional purpose.
    When cannabis is blanched, the water helps remove chlorophyll, excess plant material, and impurities that contribute to its harsh taste and aroma. By doing so, the resulting cannabis butter or oil carries a milder flavour, allowing the intended ingredients of your recipe to shine without being overpowered by the earthy, grassy notes of unprocessed cannabis.
    Moreover, blanching can help reduce some of the undesirable compounds in cannabis, such as pesticides or residual solvents that may be present in poorly processed plant material. While it’s not a substitute for sourcing high-quality cannabis, blanching offers an added layer of purification.


    The Jeff the 420 Chef Approach
    Jeff the 420 Chef is a pioneer in the art of crafting gourmet cannabis-infused edibles. His unique approach to blanching cannabis has gained popularity among home cooks and cannabis enthusiasts alike. By incorporating blanching into his process, Jeff ensures that his infusions are not only potent but also palatable and accessible to a broader audience.
    Here’s a simplified version of his procedure:


    Boil water: Bring a pot of water to a rolling boil. Ensure the pot is large enough to allow the cannabis to move freely without overcrowding.

    Prepare the ice bath: Fill a large bowl with cold water and ice. This will be used to stop the cooking process immediately after blanching.

    Blanch the cannabis: Add your cannabis to the boiling water. Use a slotted spoon or mesh strainer to ensure easy handling. Allow the cannabis to blanch for about 5 minutes.

    Shock the cannabis: Immediately transfer the cannabis from the boiling water to the ice bath. Let it cool completely to stop the cooking process and preserve the integrity of the plant material.

    Dry the cannabis: Remove the cannabis from the ice bath and gently pat it dry with a clean kitchen towel or paper towels. Spread the cannabis out on a parchment-lined baking sheet to air-dry completely before proceeding with decarboxylation.

    Benefits of Blanching
    Blanching cannabis offers several key advantages for those cooking with it:
    Improved flavour: By removing chlorophyll and impurities, the harsh, bitter taste often associated with cannabis is significantly reduced. This makes your edibles more enjoyable for those who prefer subtler cannabis flavours.

    Cleaner infusions: The process helps remove unwanted compounds, leading to purer cannabis butter or oil. This is particularly important when creating recipes where cannabis plays a supporting role, rather than being the dominant flavour.

    Enhanced versatility: Blanched cannabis pairs better with delicate dishes, such as desserts or savoury recipes with subtle seasoning, as the flavour profile becomes less overpowering.

    Odour reduction: For those concerned about the smell of cannabis during the cooking process, blanching can minimize the pungent aroma typically associated with decarboxylation.

    Decarboxylation After Blanching
    After blanching, the next step is decarboxylation, the process that activates the cannabinoids in cannabis. Decarboxylation involves heating the cannabis at a low temperature to convert THCA into THC, the compound responsible for cannabis’s psychoactive effects.

    Decarboxylate your blanched flower in the oven. Pre-heat your oven to 240°F (115°C). Grind your herb to desired consistency and spread on the parchment paper covering the cookie sheet. Cover with Tinfoil and crimp around edges. Bake for 30-40 minutes. Store in an airtight container in a cool, dark place until ready to use.

    Blanching cannabis before decarboxylation is a simple yet transformative step for those who want to create high-quality cannabis-infused edibles. By following Jeff the 420 Chef’s method, you can elevate the flavour, purity and overall enjoyment of your creations.
    While the process adds an extra step to your preparation, the benefits far outweigh the effort. Whether you’re crafting a delicate dessert or a savoury main course, blanched cannabis ensures that the taste of your dish remains front and centre, with cannabis playing a subtle yet effective supporting role.
    Experiment with this method in your next infusion, and experience the difference it can make in the world of cannabis edibles.