Author: Bud the Editor

  • Begin at the beginning – Decarboxylation

    Begin at the beginning – Decarboxylation

    Before you can get busy making magic, you have to set the stage.

    With edibles, it isn’t enough to just toss a handful of bud into the sauce and call it a day. There is a critical step necessary to make a lifted meal – decarboxylation.

    DECARBOXYLATION

    What is this and why you need to do it

    Simply put, decarboxylation is making raw cannabis flowers psychoactive. 

    This is done by using a low heat to turn tetrahydrocannabinolic acid (THCA) into Delta 9-tetrahydrocannabinol (THC). This process occurs automatically when you combust the plant, ie. Spark-up a joint or a bong. Once the herb is decarboxylated, it becomes psychoactive and can be used to infuse fats and alcohol, or even eaten as-is if that’s your preference.

    Cannabis flowers are the buds of female plants. They are covered with trichomes which contain terpenes. The ones that get the most attention are THC and CBD (cannabidiol).

    You can’t just use raw flower in cooking. The psychoactive chemical that gets you lifted is in the form of THCA. You need to get rid of the A and that’s done with heat. 

    Going forward, on this blog decarboxylation means to bake your weed at 240 F (325 C) for 30-40 minutes. 

    This is a basic procedure but is not the only way. Many variables can be manipulated, including time and temperature, all with the goal of customizing the experience, ie. which terpenes are being activated. You can make this as simple or as fussy as you like. Regardless, to put it in food you need to heat the flower first. You are encouraged to explore other techniques and procedures to discover what works best for you.

    Basic Procedure for Decarboxylating Cannabis Flower

    Decarboxylation is the name for changing THCA into THC by heating the cannabis 240 F for 20-40 minutes.

    There are two main ways to decarboxylate:

    1. Conventional oven – almost everyone has access to an oven. Make certain to cover your herbs with tinfoil or use an oven-proof and smell-proof container as things can become rather fragrant.
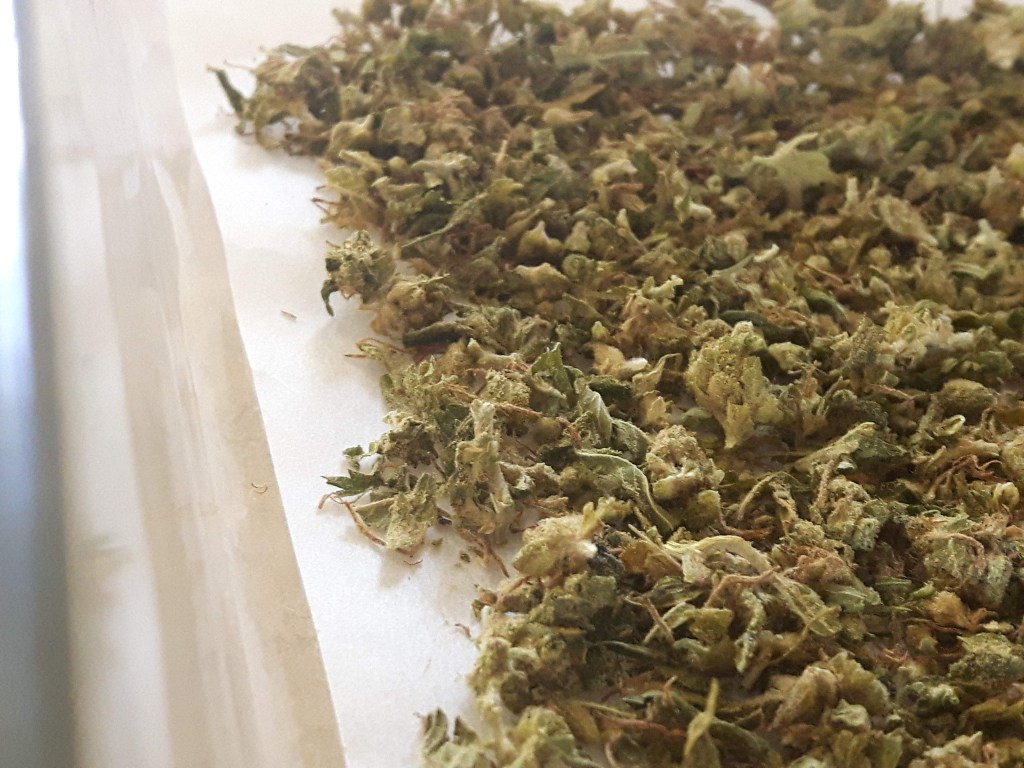
      1. Coarsely grind your buds.
      2. Place in an oven safe dish or on a parchment lined cookie sheet and cover with foil to minimize the smell
      3. Toast your flower 240 F (115 C) for 20-40 minutes. Rule of thumb, the shorter the time, the higher the temperature. Adjusting the time and temperature will allow you to activate different terpenes to achieve different effects. 
      4. Let cool. Store in an airtight container in a cool, dark place.
    2. Sous vide – Sous vide is a type of low temperature, long time cooking. The main advantage is more THCA is converted to THC, and the smell is considerably reduced. The downside is it takes longer and you have to buy specialized gear (the immersion blender or water water bath)
      1. Seal ground bud in a freezer safe resealable plastic bag, vacuum-sealed bag, or a mason jar. If using a freezer bag, place your ground cannabis in the bag. Add something to weigh it down or it will float to the surface. Immerse the bag in the water, which will push the air out. Seal the bag.
      2. Set your sous vide device (an immersion circulator or water bath) for 90 minutes at 203 F (95 C)
      3. Immerse cannabis
      4. When time is up, remove from water and let cool. Store in a glass jar with a lid in a cool, dark place.

    Tags: Decarboxylation, Basics, How-to

  • Why Edibles are the Best Way to Consume Cannabis

    Why Edibles are the Best Way to Consume Cannabis

    Consider the following reasons why edibles are the best way to consume Cannabis:

    Edibles are the best way to satisfy your 420 indulgence. From Gertrude Stein’s scandalous hash brownies to India’s Bhang, space cakes from Amsterdam, or lifted snacks during the big game, our affinity for marijuana goes beyond bongs and blunts.

    Edibles are Discrete

    Weed might be legal in Canada, but blunts, bongs, and vapes are still given the stink-eye in public. No matter. No one looks askance at nibbling a bit of chocolate on the train, yes?

    You Are In Control 

    You maintain control over dosing. Plus, you know exactly what goes into those brownies. Lifted recipes can be adapted to any lifestyle and any diet. 

    Customization 

    You get exactly what you want. Prefer more CBD? Like your THC percent a touch on the (ahem) high side? Want to exploit specific terpenes? Craf your own edibles when you can’t find the right  product to fit your lifestyle.

    Cost Effective 

    Legal weed is great, but can be expensive. Frugality is definitely a virtue. With a little practice, you will save money and learn valuable cooking skills. With edibles, you don’t need to buy premium weed. In a pinch you can use sugar leaves, popcorn buds, trim, and even stems, while saving the cannabis colas for blazing.

    Versatile 

    The list of what can’t be lifted is a very short list. Basically, THC is hydrophobic – the molecule doesn’t like water. It is lipophilic, which means it loves lipids – fats – like butter, oil, coconut oil, along with chocolate, milk, alcohol, and cream, all of which are staples in the kitchen and all of which taste delicious.

    Duration 

    Edibles take a little longer to kick-in but  are worth the wait. The lift is stronger and lasts longer thanks to the process of first-pass metabolism in the liver, which turns Δ-9-THC into 11-hydroxy-THC. It is worth noting this metabolic process is agnostic to terpenes. It doesn’t matter if your bud is top-shelf Girl Scout Cookies or budget-wise Bake Sale. The result (11-hydroxy-THC) is the same.

    Healthier Option 

    While smoking or vaping will get you lifted faster, they are less efficient in processing all available THC. Master the art of decarboxylation, a little patience while you infuse your solvent, and you will get the most from your flower. Plus, combusting and inhaling any kind of plant material is just not healthy. 

    All this makes for a compelling case in favour of edibles. But there is a major downside:

    Edibles are inconsistent

    Even with industrial mixing equipment, professional lab testing, and random sampling no two edibles will have the same amount of THC. You can get an approximate potency for the entire recipe and a theoretical number per portion, but the results will vary. Combined with the delayed onset of the lift and you can see why it’s easy to overconsume.

    The other issue is your lift is driven by your metabolism. What have you eaten recently? How active have you been? How often do you consume cannabis – daily? Weekly? Edibles can have a long lead time before they kick in and it’s easy to get blindsided because you’ve overindulged and quite forgotten how much of that infused salsa you ate.

  • How to make Lifted Gummies

    How to make Lifted Gummies

    Lifted Gummies (Basic Recipe)

    Gummies are fun, popular, and discrete. This basic recipe calls for infused MCT oil, but feel free to substitute and experiment with other lipids, methods of filling your moulds, and flavours of gelatin.

    (This particular recipe excludes Lecithin, an ingredient used as both an emuslifier and to increase bioavailability.)

    Ingredients

    • 1/4 cup (60 ml) Infused MCT Oil
    • 3 ounces (85 g) flavoured gelatin
    • 1 ounce (28 g) unflavoured gelatin
    • 1 1/2 cups (355 ml) Apple juice (avoid pineapple or citrus)
    • 1/2 cup (125 ml) sweetener, like honey or agave
    • Whisk
    • Spatula
    • Measuring cups
    • Gummy moulds
    • Makes approximately

    Directions

    1. Combine the flavoured gelatin and 1 cup (250 ml) of juice in a sauté pan or heavy-bottom pot on medium-low heat. Add the honey and infused MCT oil while stirring frequently.
    2. In a small bowl mix together the unflavoured gelatin and remaining juice (1/2 cup) and allow to bloom for 5 minutes. The gelatin will look chunky and solid.
    3. Combine the gelatins and cook over low heat for 5-8 minutes. Whisk constantly to fully incorporate the oil.
    4. Once mixed, pour the gummy slurry into your mould and allow to cool at room temperature before placing into the fridge to chill.
    5. Decant and enjoy responsibly. Gummies can be stored for a week in a sealed container away from sunlight and moisture, or about three or four months in the freezer.